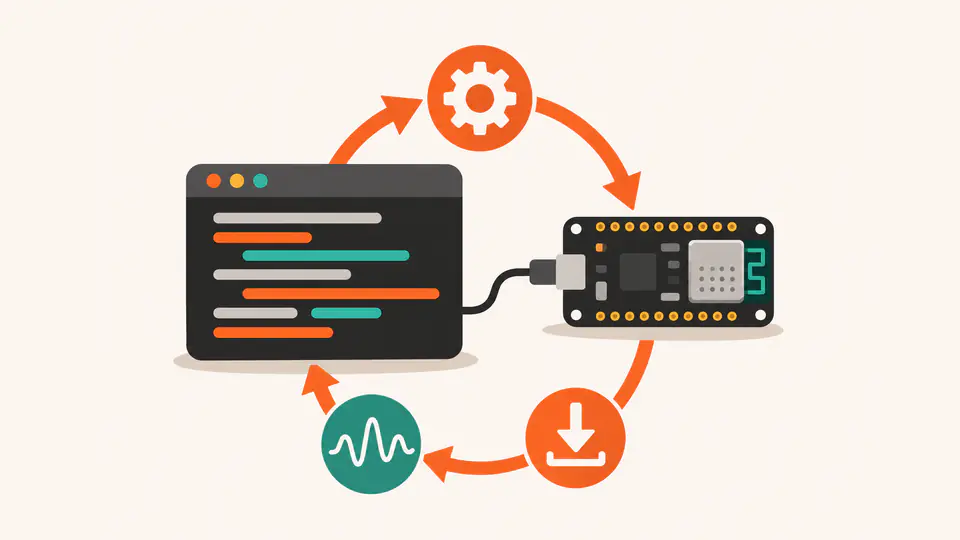
An AI coding agent is most useful on hardware when it can do three things without you copying text back and forth: build the firmware, flash it to the board and read what the board says afterwards. Give it that loop and it can find and fix its own mistakes. Without it, the agent is guessing.
This guide sets up that loop for an ESP32-S3 using Claude Code, Anthropic’s coding agent that works in your terminal. The same method suits any agent that can run commands. The examples use the ESP32-S3 N16R8 development board; if yours is still in the bag, start with the getting-started guide.
What the agent can and cannot see
It helps to be clear about this before you start.
- It can see your project files, compiler errors, upload results and anything the board prints over serial.
- It cannot see your wiring, an LED, a display, a motor or a multimeter reading.
The whole method follows from that. You move as much of the truth as possible into text the agent can read: hardware facts go in a notes file, and the firmware reports its own state over serial.
Step 1: Build from the command line
The Arduino IDE is fine for people but awkward for an agent. Install arduino-cli so that builds and uploads are plain commands:
arduino-cli core update-index
arduino-cli core install esp32:esp32
arduino-cli board list
board list shows the serial port your board is on. The board settings from the Arduino IDE’s Tools menu become options on the end of the board name. For an N16R8 board, with 16 MB flash and octal PSRAM:
arduino-cli compile -b esp32:esp32:esp32s3:FlashSize=16M,PSRAM=opi,PartitionScheme=fatflash firmware

arduino-cli upload -p /dev/cu.usbserial-XXXX \
  -b esp32:esp32:esp32s3:FlashSize=16M,PSRAM=opi,PartitionScheme=fatflash firmware
Here firmware is a folder containing firmware.ino. Replace the port with the one board list printed; on Windows it looks like COM5.
Step 2: Write the hardware down
Claude Code reads a file called CLAUDE.md in the project folder at the start of every session. Use it for the facts the agent cannot discover by itself. A short, accurate file prevents most hardware mistakes:
# Project: workshop sensor node

## Board
- ESP32-S3 N16R8 development board (16 MB flash, 8 MB octal PSRAM).
- Build: arduino-cli compile -b esp32:esp32:esp32s3:FlashSize=16M,PSRAM=opi,PartitionScheme=fatflash firmware
- Upload port: /dev/cu.usbserial-XXXX
- Read serial: python3 tools/serial_capture.py /dev/cu.usbserial-XXXX 15

## Wiring (checked by me on the bench)
- GPIO8 = I2C SDA, GPIO9 = I2C SCL, SHT31 sensor at 3.3 V.
- GPIO48 = on-board RGB LED.
- Nothing else is connected.

## Rules
- Never use GPIO 0, 3, 19, 20, 26-37, 43, 44, 45 or 46.
- All signals are 3.3 V. Do not suggest wiring changes without asking me.
- Do not change pin assignments to make a build pass. Ask instead.
- Wi-Fi credentials live in firmware/secrets.h, which is not in Git. Never print them.
The reserved pins in that list come from Espressif’s GPIO reference, and we explain each group in the getting-started guide. Update the wiring section every time you move a wire. An out-of-date notes file is worse than none.
Step 3: Give the agent a way to read serial
arduino-cli monitor keeps running until you stop it, which leaves an agent waiting forever. It needs a command that listens for a fixed time and then exits. This small Python script does that. Save it as tools/serial_capture.py and install its one dependency with pip install pyserial.
#!/usr/bin/env python3
"""Capture serial output from a board for a fixed time, then exit.

Usage: python3 tools/serial_capture.py /dev/cu.usbserial-XXXX 15
"""
import sys
import time

import serial  # pip install pyserial

port = sys.argv[1]
seconds = float(sys.argv[2]) if len(sys.argv) > 2 else 15

with serial.Serial(port, 115200, timeout=0.5) as link:
    deadline = time.monotonic() + seconds
    while time.monotonic() < deadline:
        line = link.readline().decode("utf-8", errors="replace").rstrip()
        if line:
            print(line, flush=True)
Opening the port resets many ESP32 boards, which is useful here: the capture starts from the boot messages.
Step 4: Make the firmware report on itself
Since serial text is the only thing the agent can observe, design the firmware to say what it is doing in a form that is easy to check. Three habits cover most cases:
- A boot line with a version, so it is obvious the new build is the one running.
- Self-test lines that say
PASSorFAILfor each thing that can be checked without a person. - A heartbeat every few seconds, so a crash or a hang shows up as silence.
// Firmware that reports on itself, so a person or an AI agent can check it from the serial log.
void report(const char* name, bool ok) {
  Serial.printf("[%s] %s\n", ok ? "PASS" : "FAIL", name);
}

void setup() {
  Serial.begin(115200);
  delay(1500);
  Serial.println("BOOT firmware=0.1.0");
  report("psram", psramFound());
  report("flash-16mb", ESP.getFlashChipSize() == 16UL * 1024 * 1024);
  Serial.println("SELFTEST done");
}

void loop() {
  static uint32_t last = 0;
  if (millis() - last >= 5000) {
    last = millis();
    Serial.printf("HEARTBEAT uptime_s=%lu free_heap=%lu\n", (unsigned long)(millis() / 1000), (unsigned long)ESP.getFreeHeap());
  }
}
Add a report() line for each new part of the project: the sensor answered on I2C, Wi-Fi connected, the first reading was inside a sane range.
Step 5: Run the loop
With those pieces in place, the request to the agent can be short, because the context is already in the project:
Add an SHT31 humidity reading every 30 seconds and a self-test line that confirms the sensor responds. Build, upload, capture 20 seconds of serial and check the self-test passes. If it fails, show me the log before changing anything about the wiring.
Claude Code then edits the sketch, runs the compile command, reads any errors, fixes them, uploads, runs the capture script and reads the result. It asks for permission before running commands until you choose to allow them, so you can watch the first few rounds closely.
A wrong library function name, a missing include or a type error is caught by the compiler and corrected in the same pass. That is the practical benefit of closing the loop: the mistakes an AI model is most likely to make with firmware are also the ones a build exposes immediately.
Choosing a model
Claude Code lets you pick the model with its /model command. At the time of writing, the most capable model available there is Claude Fable 5.2, which is the one to reach for when a bug spans several files or needs a long chain of build-and-test steps. A faster model is enough for small, well-defined edits.
Guardrails worth keeping
- Wiring stays your job. Check every connection yourself before powering up. The agent only knows what your notes file says.
- Keep mains voltage out of it. Stay with USB power and low-voltage parts. In New Zealand, mains electrical work is regulated and is generally a job for a licensed electrician. To switch a mains appliance, use a certified smart plug rather than a bare relay board.
- Read the diff. Review what changed before each upload, especially pin numbers and anything that drives an output.
- Use Git. Commit when something works, so a bad change is one command away from being undone.
- Protect secrets. Keep Wi-Fi passwords and API keys in a file that Git ignores, and say so in
CLAUDE.md. - Test loads safely. Before code drives a motor, heater or pump for the first time, run it with the load disconnected and watch the log.
Where this works well, and where it does not
It works well for sensor drivers, Wi-Fi and web server code, data formatting, state machines, power-saving logic and tracing a crash from a serial backtrace.
It is weaker for anything that only shows up physically: a display with the wrong colours, a noisy analogue reading, an intermittent connection or a timing problem you would need an oscilloscope to see. For those, describe exactly what you observe, and add serial output that turns the physical symptom into text where you can.
Next in this series
- Design a PETG enclosure with AI and OpenSCAD: the same loop, applied to a printed case.
- Build a filament dry-box humidity monitor: a complete project to try the workflow on.
- ESP32-S3 project ideas for NZ homes.
You can order the ESP32-S3 boards and accessories used in this guide with New Zealand delivery, or collect them free in Torbay, Auckland. A terminal breakout board makes bench wiring easier to keep tidy and to document.
How this guide was put together. It was drafted with AI assistance. The build command and the sketch were compiled with arduino-cli 1.6.0 and version 3.3.12 of the ESP32 Arduino package. The upload step and the Python script were not run on a board before publishing, so treat them as a starting point. Tools and model names change, so check the current documentation. This article is not a current stock list: check the ESP32-S3 range and the live PETG catalogue for current products, prices and stock.