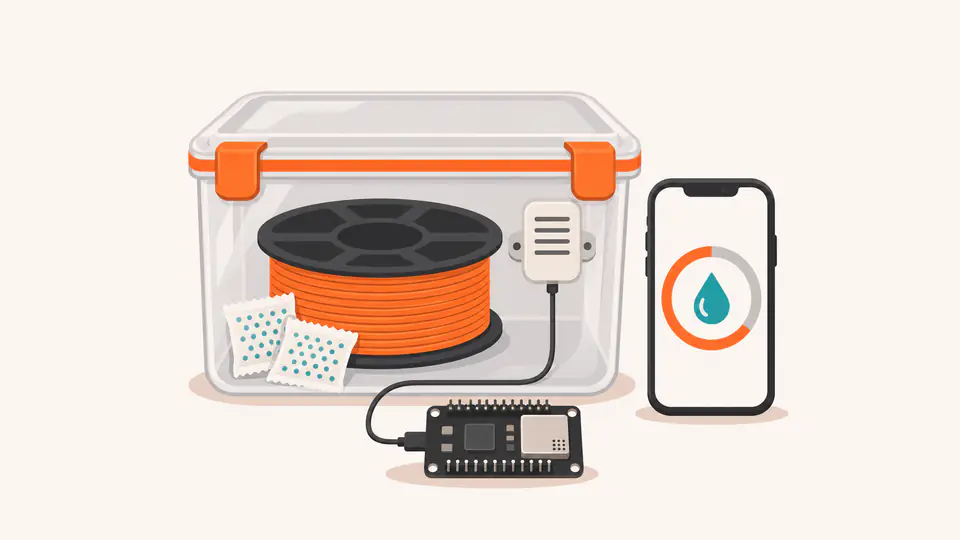
PETG filament absorbs moisture from the air, and Auckland’s air has plenty to give. A sealed box with desiccant keeps a roll dry, but only until the desiccant is full, and nothing on the outside of the box tells you when that happens. The first sign is usually stringing and a rough surface on a print.
This project fixes that with an ESP32-S3 and a humidity sensor. A light on the board shows green, amber or red, and a small web page on your home network shows the current reading. It is a good first build because it uses both halves of a maker’s bench: a little firmware, and a printed part that has a real job to do.
What you need
- An ESP32-S3 N16R8 development board. The pre-soldered headers mean no soldering on the board itself.
- A USB data cable and a USB power source. Our 30cm USB-A to USB-C cable suits a board mounted beside the box.
- An SHT31 temperature and humidity sensor on a breakout board. We do not stock sensors, so you will need to buy this separately from an electronics retailer.
- Four jumper wires, or light four-core cable if the sensor will sit away from the board.
- A storage box with a sealing lid, and desiccant.
- PETG filament for the sensor pod and board tray.
If you would rather use screw terminals than push-on jumper wires, a 44-pin terminal breakout board gives the four wires a firmer connection. Check your board’s pin layout against the breakout first.
New to the board? Work through the ESP32-S3 N16R8 getting-started guide first, so the Arduino IDE settings are right before you add a sensor.
Where the parts go
Keep the board outside the box and the sensor inside it.
The board gives off a little warmth, and warm air beside a humidity sensor changes its reading. With the sensor on a short lead, it measures the air around the filament, and the status light stays visible without opening the lid.
Pass the four-core lead through a small hole in the box wall and seal around it. A printed PETG grommet with a dab of silicone sealant works, as does a cable gland. The hole is the weak point of the whole box, so make it snug.
Wiring
The SHT31 uses I2C, which needs two signal wires plus power. On the ESP32-S3 Dev Module profile, the default I2C pins are GPIO8 and GPIO9.
| SHT31 breakout pin | ESP32-S3 pin |
|---|---|
| VIN or VCC | 3V3 |
| GND | GND |
| SDA | GPIO8 |
| SCL | GPIO9 |
Power the sensor from the 3V3 pin, not 5 V, so its signals stay at the 3.3 V level the ESP32-S3 expects. Keep the lead short: I2C is designed for connections inside a device, and a lead of a few tens of centimetres is a sensible limit without extra parts. Disconnect USB before changing any wiring, and confirm each pin against the labels on your own board.
The sketch
Install the Adafruit SHT31 Library from the Arduino IDE’s Library Manager, and accept the prompt to install its dependencies. Then upload this sketch, with your own Wi-Fi details at the top.
// Filament dry-box humidity monitor for an ESP32-S3 N16R8 board.
// Sensor: SHT31 over I2C at 3.3 V (SDA = GPIO8, SCL = GPIO9).
#include <WiFi.h>
#include <WebServer.h>
#include <Wire.h>
#include <Adafruit_SHT31.h>
const char* WIFI_SSID = "your-2.4GHz-network";
const char* WIFI_PASSWORD = "your-password";
const uint8_t RGB_PIN = 48; // on-board WS2812 RGB LED
const uint8_t SDA_PIN = 8;
const uint8_t SCL_PIN = 9;
// Example thresholds. Tune them to your own box, desiccant and filament.
const float WARN_RH = 25.0; // amber at or above this relative humidity
const float ALERT_RH = 35.0; // red at or above this relative humidity
const uint32_t READ_INTERVAL_MS = 30000;
Adafruit_SHT31 sht31 = Adafruit_SHT31();
WebServer server(80);
bool sensorOk = false;
float humidity = NAN;
float temperature = NAN;
uint32_t lastRead = 0;
void showStatus() {
if (isnan(humidity)) {
rgbLedWrite(RGB_PIN, 0, 0, 20); // blue: no valid reading
} else if (humidity >= ALERT_RH) {
rgbLedWrite(RGB_PIN, 30, 0, 0); // red
} else if (humidity >= WARN_RH) {
rgbLedWrite(RGB_PIN, 30, 15, 0); // amber
} else {
rgbLedWrite(RGB_PIN, 0, 20, 0); // green
}
}
void readSensor() {
if (sensorOk) {
float h = sht31.readHumidity();
float t = sht31.readTemperature();
if (!isnan(h) && !isnan(t)) {
humidity = h;
temperature = t;
} else {
humidity = NAN;
temperature = NAN;
}
}
Serial.printf("RH %.1f %% T %.1f C\n", humidity, temperature);
showStatus();
}
void handleRoot() {
String page = "<!doctype html><html><head><meta charset=\"utf-8\">"
"<meta name=\"viewport\" content=\"width=device-width, initial-scale=1\">"
"<meta http-equiv=\"refresh\" content=\"30\"><title>Dry box</title></head>"
"<body style=\"font-family:sans-serif;text-align:center\"><h1>Filament dry box</h1>";
if (isnan(humidity)) {
page += "<p>No sensor reading. Check the wiring.</p>";
} else {
page += "<p style=\"font-size:3rem;margin:0\">" + String(humidity, 1) + " % RH</p>";
page += "<p>" + String(temperature, 1) + " °C</p>";
}
page += "</body></html>";
server.send(200, "text/html", page);
}
void handleJson() {
String json = "{\"humidity\":";
json += isnan(humidity) ? "null" : String(humidity, 1);
json += ",\"temperature\":";
json += isnan(temperature) ? "null" : String(temperature, 1);
json += "}";
server.send(200, "application/json", json);
}
void setup() {
Serial.begin(115200);
delay(1500);
Wire.begin(SDA_PIN, SCL_PIN);
sensorOk = sht31.begin(0x44); // some SHT31 breakouts use address 0x45
if (!sensorOk) Serial.println("SHT31 not found - check wiring and I2C address");
readSensor();
WiFi.mode(WIFI_STA);
WiFi.begin(WIFI_SSID, WIFI_PASSWORD);
uint32_t start = millis();
while (WiFi.status() != WL_CONNECTED && millis() - start < 20000) delay(250);
if (WiFi.status() == WL_CONNECTED) {
Serial.printf("Open http://%s/ on the same network\n", WiFi.localIP().toString().c_str());
} else {
Serial.println("Wi-Fi not connected - the LED still shows the humidity status");
}
server.on("/", handleRoot);
server.on("/api", handleJson);
server.begin();
}
void loop() {
server.handleClient();
if (millis() - lastRead >= READ_INTERVAL_MS) {
lastRead = millis();
readSensor();
}
}Open the Serial Monitor at 115200 baud after uploading. The board prints a reading, then the address of its web page. Open that address in a browser on the same network to see the humidity and temperature. The /api path returns the same reading as JSON, for a home automation system or a script.
What the light means
- Green: below the warning threshold.
- Amber: at or above the warning threshold. Plan to dry or replace the desiccant.
- Red: at or above the alert threshold. Deal with it before the next long print.
- Blue: no valid sensor reading. Check the wiring and the I2C address.
Choosing your thresholds
The two numbers in the sketch are examples, not a standard. The right values depend on your box, how much desiccant is in it and how sensitive your filament is, so set them from your own readings:
- Put freshly dried desiccant in the box, close it and leave it for a day.
- Note the reading it settles at. That is your box at its best.
- Set the warning threshold a little above that figure, and the alert threshold higher again.
The trend tells you more than any single number. A reading that creeps upwards over a few weeks means the desiccant is filling up. A reading that jumps after you open the lid and does not come back down means the seal or the cable hole is leaking.
A monitor only tells you about the air in the box. If a roll has already absorbed moisture, it needs drying: see why and how to dry filament and check your filament’s label for its drying instructions. The same guide covers sealed storage with desiccant between prints.
Print the parts in PETG
Two small prints finish the build, and PETG suits both because it has enough give for clips and thin walls.
- A vented sensor pod. A small cap with slots, which holds the sensor breakout inside the box, clear of the desiccant and the spool. Air has to reach the sensor, so do not seal it in.
- A board tray. An open tray that holds the board on the outside of the box with the status light visible.
Our guide to designing a PETG enclosure with AI and OpenSCAD includes a parametric tray you can adapt, and explains how to measure your board first. Print with the settings on your spool’s label: the PETG print settings guide shows where to find them. A translucent or transparent PETG lets the status light show through a closed lid.
Take it further
- Log the readings. Have a computer on your network request
/apievery few minutes and append the result to a file, so you can see the trend. - Connect it to a home automation system using the JSON output.
- Monitor several boxes with one board and an I2C multiplexer, since SHT31 breakouts offer only two addresses.
- Let an AI agent extend it. The Claude Code firmware workflow shows how to have an agent add a feature, build it and check the serial log for you.
For more builds in the same spirit, see seven ESP32-S3 project ideas for NZ homes.
How this guide was put together. It was drafted with AI assistance. The sketch was compiled against version 3.3.12 of the ESP32 Arduino package and version 2.2.2 of the Adafruit SHT31 Library for the ESP32S3 Dev Module profile, but it was not run on hardware by us before publishing. Check the wiring against your own board and sensor. This article is not a current stock list: check the ESP32-S3 range and the live PETG catalogue for current products, prices and stock.